How to Read a Trail Map: Avoid Wrong Turns
🗺️ What’s in here (so you don’t get lost scrolling)
I learned how to read a trail map the hard way—by getting lost in the fog on a ridge in New Hampshire with a paper map that I could barely decode. The trail junction looked nothing like the neat little lines on paper. That was eight years ago. Since then, I’ve led dozens of group hikes, and I still keep a folded map in my pocket even when I’m using a GPS app. Reading a trail map isn’t just about symbols; it’s about asking the right questions before you step onto the path. Below is the routine I now use every single time.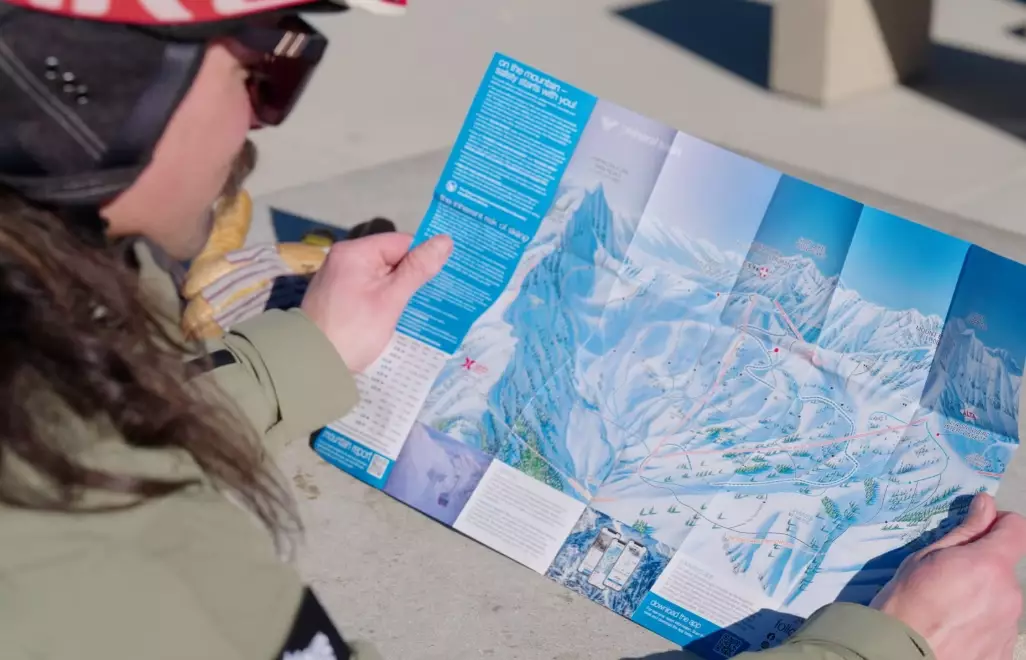
The 60-Second Orientation Check
First thing: flip the map over. Look at the legend and the date. I don’t care how fancy the paper feels—if it’s more than three years old, trail reroutes might be missing. Next, identify these three anchors: north arrow, scale bar, and trailhead parking. I lay the map flat on my car hood, align the north arrow with my compass needle (ignoring declination for a second), and figure out which direction the main trail leaves the lot. That’s the first 60 seconds. Skip it and you’ll stare at your map at the first fork like it’s a piece of abstract art.
One detail most people miss: trailhead signs often have a tiny “you are here” dot. Trace the line from that dot. If you can’t find the dot, find the road you drove in on. That’s your anchor.
Trail Map Symbols: What the Official Key Never Tells You
Trail map symbols in national parks and forests follow a loose standard, but the colors and numbers vary wildly. A black-dashed line might mean a footpath in one state forest and a closed logging road in another. My advice: never assume. I always find the blazes listed for the specific trail junction I’m heading to. The key on the back of the map is your friend, but it’s written by rangers, not by hikers who’ve actually gotten muddy on the route.
Here’s a quick comparison table of the most common trail map symbols I’ve encountered on U.S. Forest Service maps, based on notes I’ve kept from hikes in the Pacific Northwest, Southwest, and Northeast:
| Symbol or Color | Common Meaning | What I Actually Watch For |
|---|---|---|
| Solid red line | Maintained trail | Look for blazes painted on trees—they confirm the map is current |
| Black dashed line | Unmaintained or user trail | These often vanish at stream crossings; expect to route-find |
| Blue diamond | Cross-country ski trail | Summer hiking on these can be mushy and buggy |
| Brown dashed line | Old road or logging skid | If it’s dashed, the grade might be gentle but the brush could be thick |
| Red X or “T” | Trail junction or terminus | Count your junctions; one missing X means you’ve overshot |
I’ve stopped relying on color alone. On a bright day, a faded pink line on a beige map can look identical to a brown one. That’s when I pull out my phone, not to navigate, but to check the agency’s official trail conditions page—like the U.S. Forest Service or a state park website—for alerts about reroutes or closed bridges. The map in your hand is a snapshot. The online page is the update.
How to Read Contour Lines Before Your Legs Find Out
Contour lines are the best way to predict how a trail will feel. Each line connects points of equal elevation. The tighter they are spaced, the steeper the slope. I learned this on a so-called “easy” loop in Sedona that looked flat on the map but actually dropped 500 feet in a quarter-mile. Now I trace my finger along the trail line, count contour crossings, and estimate total climbing. A quick trick: if the trail crosses five contour lines within the span of my thumb (about 1 inch on a 1:24000 map), that’s roughly 200 feet of elevation gain—steep enough to feel it in your calves.
My non-consensus tip: Don’t just trust the elevation profile printed on the map. Those profiles are often averaged. I’ve been burned by a profile that showed a gentle grade but the actual trail had two steep erosion gullies that required scrambling. Contour lines show the truth: a V-shape on the contour pointing uphill means a drainage or gully. Expect water and mud there even days after rain.
Reading Trail Blazes at Every Fork
The trail fork is where trail maps meet reality. I always pre-identify every junction on the map and mark it mentally. Then, at each fork, I look for two things: a painted blaze on a tree or rock, and a trail sign. If the map shows a junction but there’s no blaze, I stop. That’s a red flag. Sometimes a trail has been decommissioned but the map still shows it. I’ve seen this in the Catskills—a beautifully drawn trail that ended in a thicket of thorn bushes.
Blaze colors correspond to the line color on the map in most parks, but not all. In one Ohio state forest, the map used red for the main loop, but the actual blazes were blue. Don’t ask me why. Now I take a photo of the trailhead sign with my phone. It lists the blaze colors. That 10-second action has saved me from at least three wrong turns.
Compass, Declination, and the One Mistake New Hikers Make
Here’s where most people’s map reading falls apart: declination. That’s the angle between magnetic north (where your compass needle points) and true north (where the map’s grid lines point). In the Pacific Northwest, declination can be 15 degrees east; in Maine, 15 degrees west. If you don’t adjust, your compass bearing will be off by hundreds of feet over a mile. I’ve made this mistake. I ended up walking a quarter-mile down the wrong ridgeline because I forgot to set the declination on my baseplate compass.
So how do you handle it? If you’re using a paper map and compass, set the declination once at the trailhead. There’s usually a line in the map’s margin telling you the declination for that area. On your compass, rotate the bezel until the orienting arrow points to the correct declination. Then you’re ready to take a bearing. If you’re using a GPS app, check if it’s set to true north or magnetic north. The native compass app on most phones uses magnetic north, but the map orientation might be true north. That mismatch can confuse you at a junction. I always toggle my app to “true north” so it matches the paper map.
Another under-discussed point: trail maps are often oriented with north at the top, but not always. Some park maps are rotated to fit the paper. That little north arrow is your guide—don’t assume “up” means north.
Questions Hikers Actually Ask Me
What should I do when the trail map shows a junction but I don’t see any blaze or sign?
Turn around and backtrack to the last confirmed blaze. In my experience, missing blazes at a junction usually mean the trail is unofficial, overgrown, or rerouted. Pushing ahead is how people end up bushwhacking. I carry a small roll of bright surveyor’s tape to mark my own path if I ever need to retreat, but I don’t recommend continuing without a clear blaze.
How do I read a trail map when the trail follows a stream or river?
Look at the blue line. The map usually shows the stream as a thin blue line, and the trail as a dashed or dotted line running parallel. The key detail is the distance between the trail and the stream. If the trail is on the bank, expect erosion and possible washouts. I check the contour lines next to the stream—if they’re tight, the trail might climb above the water, which means you won’t have easy access for filtering water. Plan your water stops accordingly.
What does a “seasonal” trail mean on a map, and can I still hike it?
Seasonal trails are often closed for wildlife protection, mud, or maintenance. The map might show a dotted line with a note like “seasonal closure Dec–Apr.” Those dates vary by agency. I always check the land manager’s website (like a national forest or state park page) for current closure orders before I plan a hike. I’ve seen hikers ignore seasonal closures and get fined. It’s not worth it.
This article was fact-checked against public trail map standards from the U.S. Geological Survey and the U.S. Forest Service. I still carry a paper map on every hike, even with a phone in my pocket. The map doesn’t run out of battery, and it doesn’t mind a little rain—as long as you keep it in a plastic bag.


Comments
Share your experience